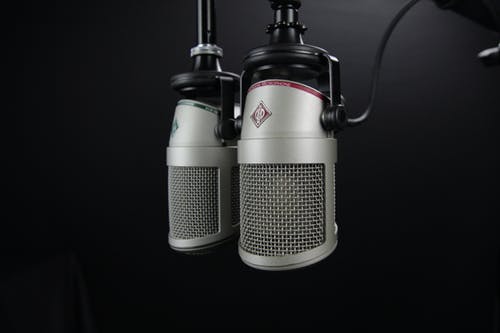
Ever wondered why most people hang a condenser mic upside down?
The simple reason is that such a mic position allows for better mic position and helps you get better sound quality
\when I first started singing and recording my own songs, my mics was placed standing up
And then I had the opportunity to visit a much bigger studio and I saw their mics hanging upside down.
This got me thinking and I wondered why hang a condenser microphone upside down?
As usual, I got into research mode and started to ask questions from most recording producers and audiophiles I met.
So in this article, I will be explaining the simple reason why most people hang their mics upside down and some microphone tips to help you get the best out of your condenser mic.
Related: Check out this massive guide on the best microphones
Where did this idea come from?

The idea of hanging your mic upside down is something that was quite common and popular among audiophiles in the 60s and 70s.
What happened is that these guys realized that doing such a hack helped the artists to better deliver awesome vocals
Also it had a reducing effect on the amount of stress they placed on their lungs while singing
In fact, there is a famous picture of Frank Sinatra where he was recording a song with an upside down condenser microphone.
This is where the whole idea of an upside down microphone became very popular and most people started to adopt this particular method
There are a lot of benefits that most people get from using the audio hack when recording
The major thing to note is that you want to make sure the microphone is well secured and does not fall down
Related: 10 Best Condenser Microphones
Benefits of hanging a condenser mic upside down when recording
- It helps to reduce the temperature and cool the mic. When using a condenser microphone to record, the tube heats up and eventually this temperature change can affect the mic and reduce the sound quality. This is because the mic consists of parts such as the backplate and the diaphragm which are critical for soundwave to electrical conversion. So when it hangs upside down, the diaphragm is above and air can blow and cool it down
- Secondly, when singing with an upside down microphone, it allows your vocal cords and airways to open up well. This allows you to hit higher and lower notes easily without any stress.
- Finally, singing with an upside down microphone does not restrict or block your view of the lyrics. This allows you to deliver better and consistent audio performance every time.
Things to be aware of before using an upside down mic placement
- Make sure the shock mount is secured correctly and tightly. This will prevent your mic from falling down and getting damaged.
- Also make sure that it is placed high and well above reach so nobody walks into it and pushes it down. Here is an article I wrote reviewing overhead mic stands.
- Finally, make sure you provide good counterweight and balance that keeps the base well secure and standing erect so it down not fall down.
Top 7 Condenser Mic tips
1. Invest in the right microphone.
I really cannot stress this point enough. The right microphone will save you from years of stress and ensure that you have clean, clear audio recordings
Want some recommendations? Here are my favourites
- Here is a review showing the best mic for rapping
- And this awesome cheap microphone I found on Amazon.com
2. Treat your microphone with care
Always treat your mics with tenderness and care
You paid good money for them right
Remove them and place them in their cases when not in use and make sure you do not drop or slam them to avoid damage to the diaphragm
Also ensure that they are placed in slightly cold places and away from dust to ensure they last for a very long time.
3. Use a microphone stand
Some audiophiles like to record with the microphone in their hands.
Unless holding the mic is absolutely necessary, avoid that technique.
Another common microphone-stand mistake is connecting it to a surface your hands or feet easily touch.
If it’s a desk-mount stand, try connecting it to a nearby piece of furniture that’s not touching the desk. Or, if it’s a floor-mount stand, make sure the feet rest on carpet or padding.
Otherwise, the small movements you make during recording can transfer up the stand and into the microphone, which produces distracting sounds.
Here is an interesting review I wrote about overhead mic stands
4. Find a great and quiet place to record
Pretty straight forward right?
You want to ensure that all your recordings are done in a quiet place free from noise and background activities.
I know most people will tell you it can be fixed during post production… believe me you definitely want to avoid that trouble before you begin
5. Speak near the microphone
Most people tend to shy away from the microphone. Even though the condenser microphone has great sensitivity, you also want to make sure you come a little closer and speak directly into the mic when recording.
This will ensure that your words are not clipped and you sound clear
Even a short distance from the mic will make you sound like you are in a cave
6. Use a pop filter
Have you ever listened to a song where there was no pop filter in place?
I have and I can tell you… it’s not a thing of joy
So make sure you have a pop filter to reduce plosives
Plosives are simply the air from consonant sounds that are disrupting the sensitive components of the microphone
The pop filter, a screen that goes around or in front of a microphone, is a tried-and-true solution
Here is a very cheap and effective one i found on Amazon.com
7. Use the right audio interface
Know what happens when you use a crappy audio interface?
Yeah… crappy and poor audio quality
Most people might recommend getting a mixing board, but an audio interface is actually much better and cheaper
The simplest solution is simply to plug your microphone into an audio interface that then converts your analogue computer sound into digital so your computer understands it
My current audio interface favourites are

